How To Apply Nail Wraps
ManicureFX nail wraps offer the quickest, simplest, and most flawless method for achieving a manicure at home. These wraps are self-sticking and eliminate the need for any heat or curing process.
!! BONUS TIP 1 !! Apply Before Bed Time. This allows ample time for the wraps to securely bond with the nail surface, ensuring enhanced durability. Additionally, avoid applying lotion to your hands both before and after the wrap application on that day, as it can hinder the wraps from adhering correctly.
!! BONUS TIP 2 !! Apply Base Coat. While it's not always necessary, if you find your nail surface is sensitive to the adhesive, applying a base coat before the nail wraps can offer protection. This approach serves two purposes: it safeguards your nail surface and potentially enhances the adhesion of the nail wraps. Just ensure the base coat is completely dry before applying the nail wraps.
Please read below the simple instructions and also watch the video instructions at the bottom of the page about how to use and put on nail wraps.
Step 1. Wash Hands.
A crucial yet frequently missed step in the application process is washing your hands before applying the nail wraps. The natural oils on our hands can interfere with the adhesive, preventing the nail wraps from sticking properly to the nails. To ensure a durable application that lasts for days, always make sure to thoroughly clean and wash your hands with soap before applying the wraps.
Step 2. Buff Nail Surface Slightly (Optional).
Buffing the surface of your nails can be beneficial for those who encounter difficulties with nail wraps not adhering properly, whether the issue is inconsistent sticking across different nails or general adherence problems. This can occur due to the presence of tiny bumps, an uneven surface on some nails, or a naturally very shiny nail surface, all of which can prevent the wraps from sticking securely and cause them to fall off. If you're facing such issues, buffing your nails before application can significantly improve the situation.
Step 3. Use Alcohol Swabs Provided To Clean Nails.

This step complements the previous one by further cleansing your nails before applying the nail wraps. It guarantees the nail wrap adheres properly, ensuring it stays in place without falling off.
Step 4. Choosing The Right Size.

This step is equally crucial. Always choose a nail wrap that is slightly narrower than the width of the nail you're applying it to. If the nail wrap is too large and overlaps onto the skin, it won't form a secure seal, leading to improper adherence and causing the wrap to detach prematurely.
Step 5. Remove Plastic Clear Cover.
Before application, be sure to remove the thin, clear plastic layer covering the wraps. This coating is designed to preserve the quality and integrity of the nail wraps.
Step 6. Peel The Nail Wrap From Top Side.
Gently peel the nail wrap starting from the top side, which will be filed down since the wrap's length exceeds that of the nails.
Take care to avoid contact between your skin/hands and the adhesive side of the wrap, as this can diminish its stickiness.
Step 7. Place The Nail Wrap On To The Nail.

Position the bottom of the wrap slightly beneath the cuticle, then use another finger to softly press and stretch the wrap, eliminating any air bubbles.
Mastering this technique may require a bit of practice, so allow yourself some time to get accustomed to it. With a few tries, you'll become an expert at it—guaranteed.
Step 8. File Excess.

Use downward motion of the file provided to remove the excess nail wrap.
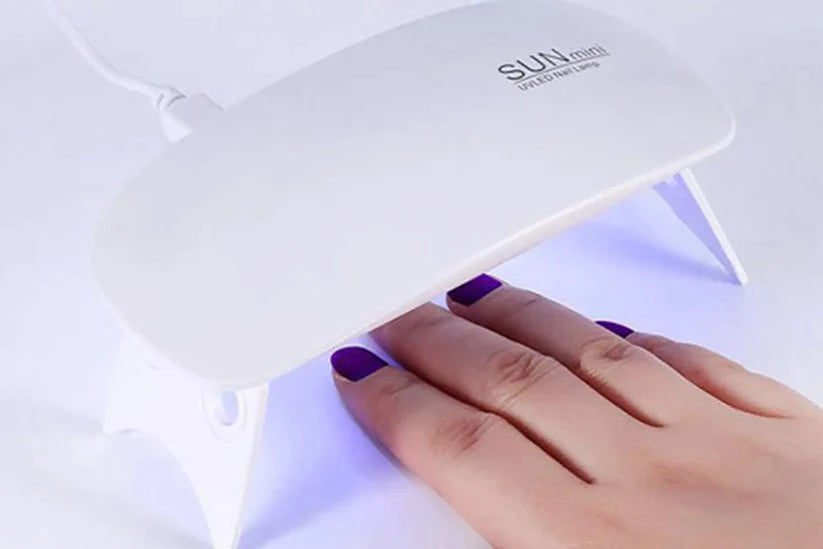
Extra Step For GEL Wraps Cure For 60 Sec to 120 Sec
Step 9. Apply Top Coat (Optional)
ManicureFX nail wraps maintain their gloss and shine impeccably, even after several days of wear, eliminating the need for a top coat for this purpose.
However, applying a top coat is an optional step that can further extend the lifespan of your nail wraps. While not necessary, it can enhance the durability of the wrap's adhesion. Be aware that some top coats may cause slight shrinkage of the nail wrap, though most are compatible. It might require a bit of experimentation to find the top coat that works best with these nail wraps.
Step 10. Avoid Water To Hands For Few Hours.
The initial 2 to 3 hours following the application of your nail wraps are critical, as the adhesive is still in the process of bonding to the nail during this time. Please refrain from showering or engaging in any activities that would expose your hands to water within the first 2 to 3 hours.
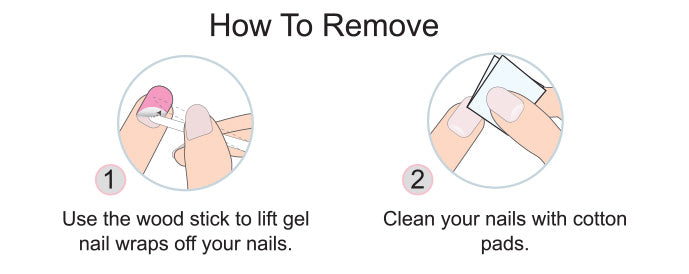
How To Remove Nail Wraps.
To remove the nail wrap, gently lift a corner with a cuticle stick and carefully peel it off. If the adhesive remains strong, soaking your nails in warm water for 3 to 5 minutes can help loosen the adhesive for easier removal. After peeling off the nail wraps, clean any remaining adhesive from your nails with soapy water.
How To Remove GEL Nail Wraps
Removing UV-cured GEL Wraps is straightforward. Simply apply a few drops of nail polish remover or oil to one side of the nail as illustrated below, and use the provided bamboo stick to lift the wrap. Continue this process until all the adhesive and wrap have been fully removed. If necessary, apply additional oil or remover to assist with the removal.